The Complete Guide to Installing a Backup Camera in Your SUV: Step-by-Step Instructions and Tips
Installing a backup camera in your SUV is a smart move for enhancing safety and convenience on the road. These cameras help prevent accidents by providing a clear view of what’s behind your vehicle, making reversing and parking easier, especially in tight spaces. Whether you’re a seasoned DIY enthusiast or new to car modifications, this guide will walk you through the steps to install a backup camera in your SUV, regardless of your technical skills.
Understanding Backup Cameras
What is a Backup Camera?
A backup camera, also known as a rear-view camera, is designed to help drivers see the area directly behind their vehicle. This view is often obstructed in SUVs due to their size and structure. The camera provides a live video feed to a display screen inside the vehicle, making it easier to reverse safely, avoid obstacles, and park with confidence.
Types of Backup Cameras:
- Wired vs. Wireless:
Wired cameras provide a reliable video signal and are less prone to interference, but they require more effort to install due to the need for running cables. Wireless cameras are easier to install, with no need to run cables through the vehicle, but may suffer from signal interference in certain conditions. - OEM vs. Aftermarket:
OEM (Original Equipment Manufacturer) cameras are designed specifically for your vehicle model, ensuring perfect fit and integration. Aftermarket cameras offer a wide range of options and prices but may require adapters or additional parts for installation. - License Plate-Mounted vs. Dashboard-Mounted:
License plate-mounted cameras are easy to install and offer a central view from the rear of the vehicle. Dashboard-mounted or rear-view mirror-mounted options integrate seamlessly with your vehicle’s existing systems but may require more complex installation.
Innovative Features in Backup Camera Technology
As technology evolves, so do the features and capabilities of backup cameras. Modern backup cameras now come equipped with advanced functionalities like night vision, wide-angle views, and high-definition resolution, enhancing visibility and safety for drivers. But the innovation doesn’t stop there.
Looking ahead, the Future Trends in Automotive AI promise to further revolutionize how these cameras operate. For instance, integrating Artificial Intelligence (AI) into automotive systems is paving the way for smarter cameras that can detect objects, predict potential collisions, and even communicate with other vehicle systems to provide real-time alerts.
These advancements will make backup cameras more than just a reversing aid; they will become an integral part of the vehicle’s overall safety architecture.
Choosing the Right Backup Camera for Your SUV:
When selecting a backup camera, consider your vehicle’s compatibility, installation complexity, budget, and desired features. Look for cameras with night vision, wide-angle views, and high resolution for better visibility. Choose a camera that suits your comfort level for installation and fits your vehicle’s style and needs.
Preparation Before Installation
Tools and Materials Needed:
To install your backup camera, gather the following tools:
- Essential Tools: Screwdrivers, electrical tape, wiring kit, power drill, multimeter.
- Optional Tools: Fishing tools, rubber grommets for feeding wires through tight spaces.
Selecting the Ideal Installation Spot:
Choose the best location for installing the camera. Popular spots include above the license plate or embedded in the bumper. Consider factors like:
- Visibility: Ensure the camera provides a clear, unobstructed view of the area behind your vehicle.
- Aesthetics: Mount the camera in a spot that doesn’t detract from the vehicle’s appearance.
- Protection: Install the camera in a location where it is protected from weather elements and road debris.
Reading the Vehicle Manual:
Before starting, read your vehicle’s manual to understand its wiring and paneling. This step is crucial to avoid damaging any components or voiding the warranty.
Step-by-Step Guide to Installing a Backup Camera
1. Plan the Installation
Measure the distance from the camera mounting location to the display screen to ensure you have enough cable length. Plan the wiring route carefully to avoid interference with other components like airbags or speakers.


2. Remove Necessary Panels and Access the Wiring
Remove the interior panels that cover the areas where you’ll run the wires, such as near the head unit or rearview mirror. Use proper tools to prevent scratching or breaking the panels. Keep the screws and clips safe for reinstallation.
3. Install the Monitor or Display Unit
Decide whether to use a mirror-mounted monitor or a dash-mounted display. Follow the manufacturer’s instructions to securely mount the monitor in your preferred location. For vehicles with an existing display, integrate the camera feed using the appropriate adapters.
4. Run the Cables
Route the power, trigger, and video cables from the back of the vehicle to the monitor. Use zip ties to secure the cables along the path and avoid sharp edges that could damage them. Ensure the wiring does not interfere with any moving parts.
5. Mount the Backup Camera
Mount the camera securely in your chosen location. Ensure it is properly aligned to provide the best view. License plate cameras can be attached using the existing screws, while bumper-mounted cameras may require drilling.
6. Connect the Wiring
Connect the camera to a power source, such as the reverse light, to ensure it activates when you shift into reverse. Secure all connections with electrical tape and use waterproofing methods to protect them from moisture.
7. Test the Camera System
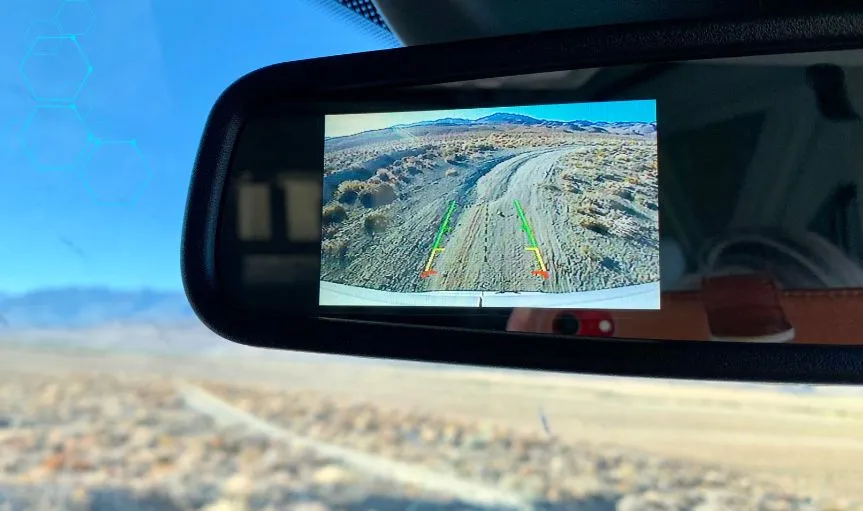
Turn on the vehicle and shift into reverse to test the camera. Check for a clear video feed and adjust the camera angle as needed for optimal visibility. Ensure all connections are secure and the camera is functioning properly.
Troubleshooting Common Installation Issues
- No Signal or Black Screen:
Check for incorrect wiring or loose connections. Ensure all wires are properly connected and secure. - Interference or Poor Image Quality:
Use higher-quality cables or reposition the camera to reduce interference. Avoid running the video cable near power lines. - Error Messages or Warning Lights:
Verify that all connections are correct and check for any compatibility issues with the vehicle’s system.
Tips for Maintaining Your Backup Camera
- Regular Cleaning:
Clean the camera lens regularly to prevent dirt and debris from obstructing the view. - Protecting the Camera from the Elements:
Ensure the camera is properly sealed and protected from water and dust. - Software Updates and Calibration:
Check for any software updates or calibration settings to maintain optimal performance.
Professional Installation vs. DIY
- Cost Considerations:
Professional installation may cost more but saves time and ensures a perfect fit. DIY installation is cheaper but requires time and effort. - Skill Level Assessment:
Determine if you feel comfortable handling the installation yourself or if you would prefer to hire a professional.
Conclusion
Installing a backup camera enhances safety and convenience for any SUV driver. Follow these steps to complete the installation yourself, or consider professional help if you’re unsure. Share your experiences or tips in the comments to help others with their installations!